Remote Slicing
Remote slicing is the capability of handing over the process of slicing to a remote desktop computer or server.
What is/are the reason(s) to use remote slicing?
On boards like Raspberry Pi, the process of slicing large STL files could take up to 30 minutes, whether on a normal Personal Computer, it takes about 2 to 3 minutes. By using Remote Slicing your waiting time decreases significantly.
How to use remote slicing?
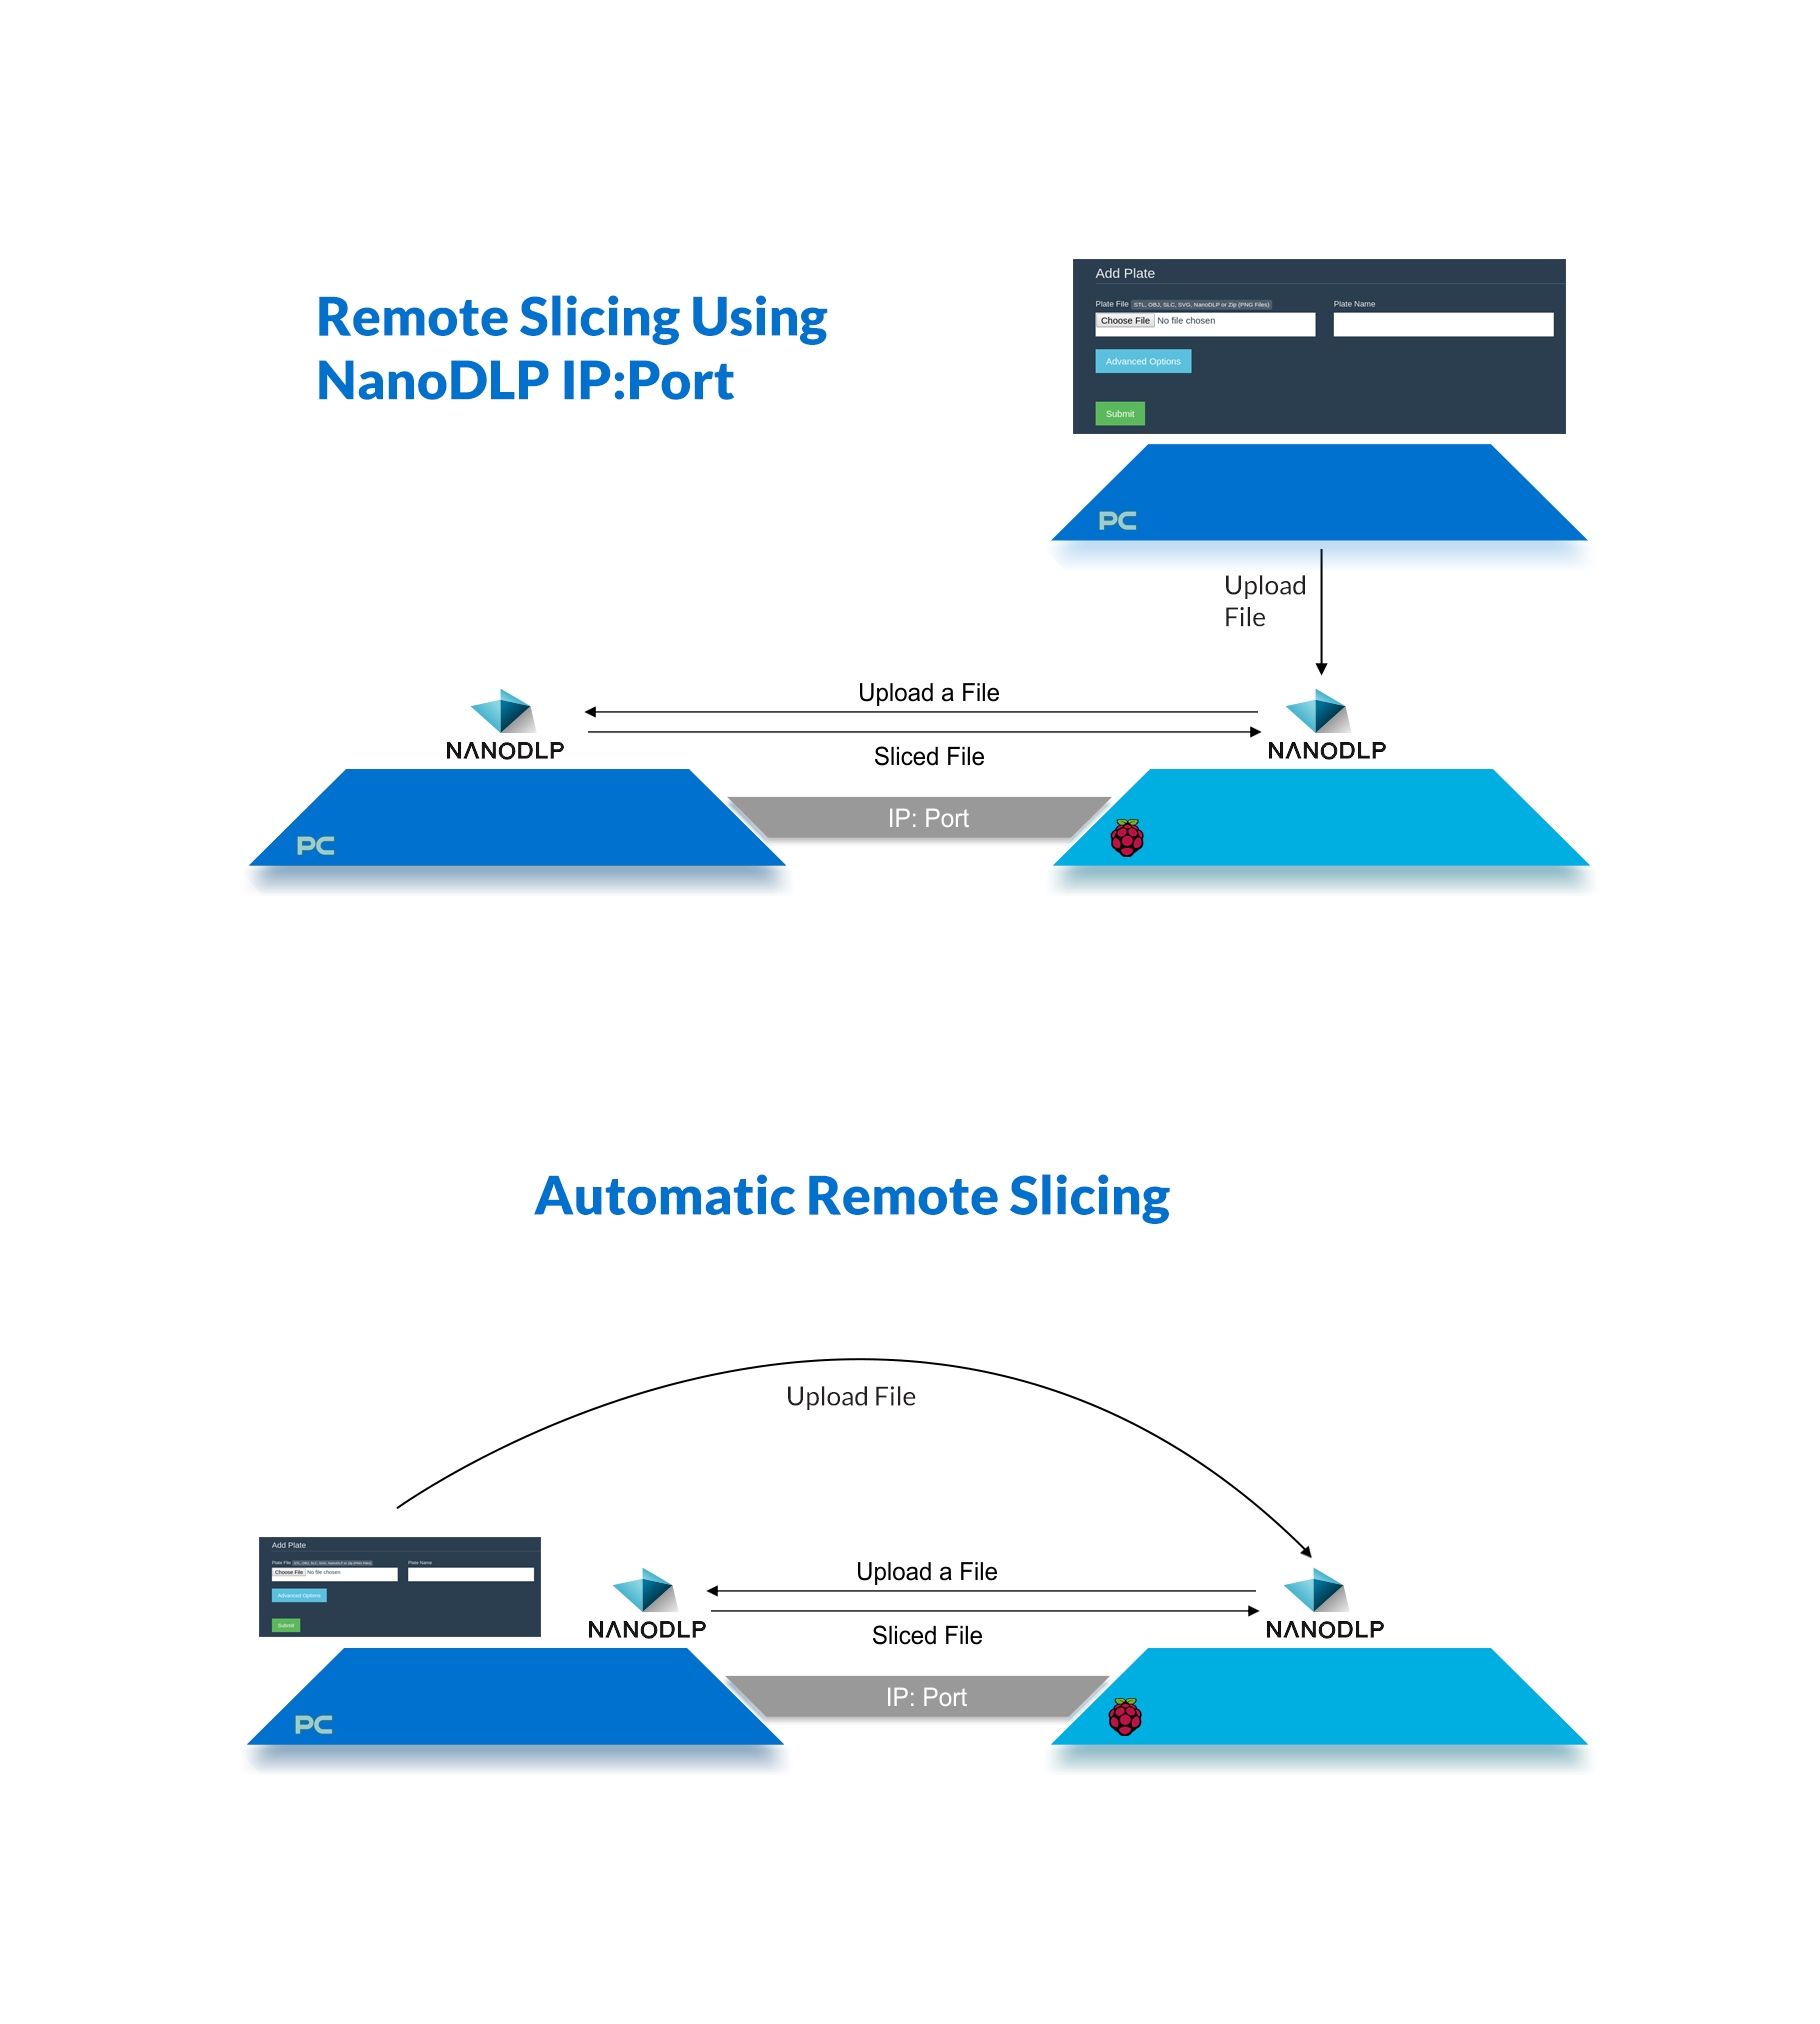
There are three ways to use Remote Slicing:
Automatic
If you have installed NanoDLP on your Personal Computer, try to connect to NanoDLP on Raspberry Pi by opening your favorite browser. Once you upload a plate on NanoDLP Raspberry Pi, the NanoDLP on your Personal Computer will be detected and the process of slicing is going to start remotely.
Manual setup
Navigate through System > Machine Settings > Slicing > Remote slicing and enter the IP alongside the Port number.
IP could be private (local) network IP or public IP / port forwarding, loopback IP (127.0.0.1 / 0.0.0.0) should not used. Default port is usually 80 for Raspberry and 8080 for other devices. Checkout this guide if you are not sure how to find your IP address.
NanoSupport
NanoSupport has embedded NanoDLP inside which detect your printers and resin profile slice locally then automatically update files to your chosen printers.
How remote Slicer works
- NanoDLP installed on Raspberry Pi and Windows computer being used by user.
- A new plate uploaded to Raspberry Pi.
- Raspberry Pi NanoDLP detects active NanoDLP installation on users' Windows computer.
- Raspberry Pi transfer required data to Windows.
- NanoDLP on Windows start processing.
- NanoDLP on Raspberry Pi get status update from Windows version. And wait until slicing get completed.
- NanoDLP on Raspberry Pi fetch prepared data.
Troubleshoot
You need to add inbound connection exception on your firewall to make NanoDLP on your PC/Mac accessible, usually your OS will ask for permission upon running NanoDLP but if it does not, you need to do it manually.